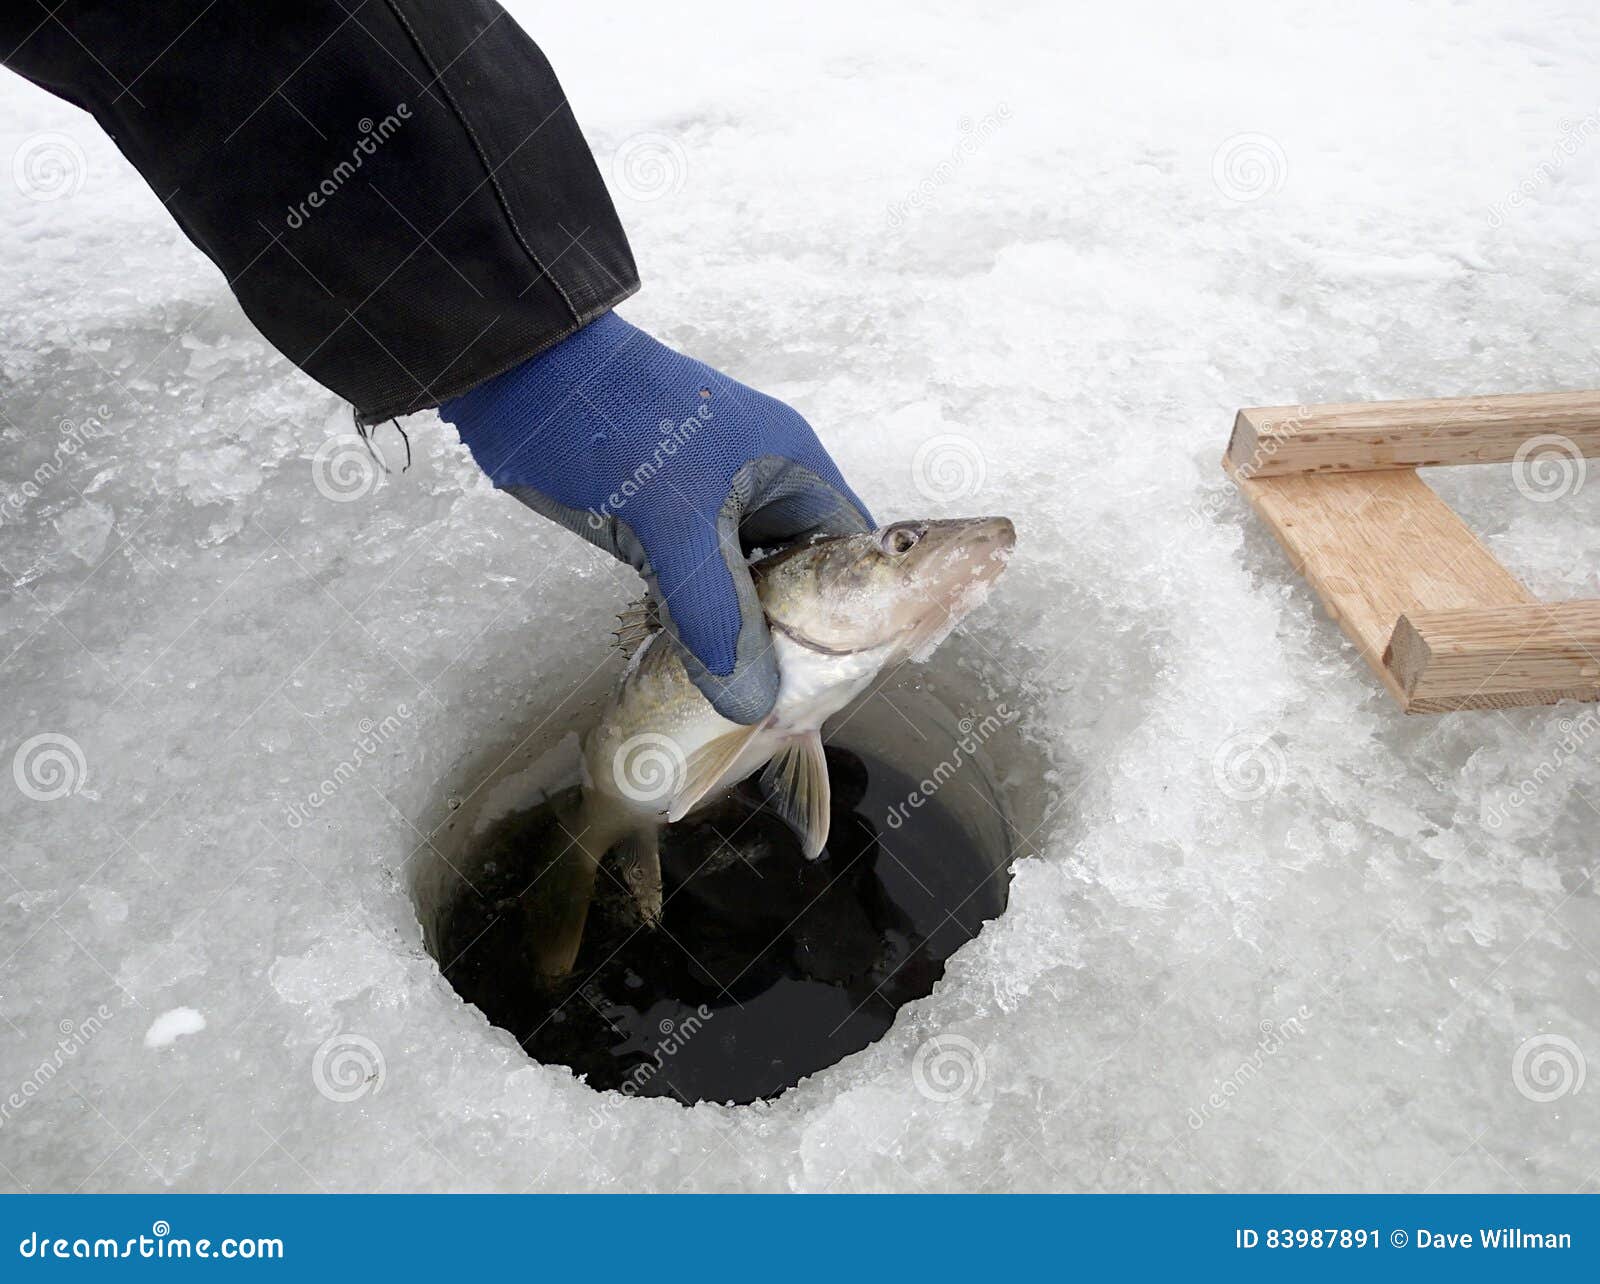
Walleye are the reason most of us drill holes in the ice. They’re the fish that gets people out of bed at four in the morning to drive two hours in the dark, haul gear across a windswept lake, and sit in sub-zero temperatures with a short rod and a prayer. And when that rod loads up and you feel the headshakes of a walleye pulling against the drag, every frozen minute becomes worth it.
But walleye under the ice aren’t the same animal you chased with a jig and minnow off the back of a boat in September. Their metabolism has slowed. Their movements are deliberate, sometimes maddeningly so. They use structure and light conditions differently, and their willingness to commit to a bait can change by the hour. Understanding those patterns — where walleye go, when they move, and how to present a bait they’ll actually eat — separates anglers who consistently catch walleye through the ice from those who stare at a blank flasher all day.
We’ve spent years chasing walleye through the hardwater across the Midwest and into Canada, and we’ve made every mistake worth making. This guide distills what we’ve learned about finding, reading, and catching walleye under the ice. If you’re newer to the sport, our ice fishing beginner’s guide covers foundational gear and safety before you chase species-specific patterns. For the full picture of our hardwater coverage, visit our ice fishing hub.
Where to Find Walleye Under the Ice
Finding walleye through the ice starts with understanding that these fish relate to structure and depth transitions far more predictably in winter than they do during open water. Cold water reduces their range of movement. They aren’t roaming open basins the way they might in summer — they’re holding near specific features and making relatively short feeding migrations to and from those features on a schedule dictated by light and oxygen levels.
Structure Is Everything
Walleye are bottom-oriented fish, and that doesn’t change under the ice. The features that hold walleye in winter are the same ones that hold them during open water, just at different depths. Focus on:
- Main lake points: Especially long, tapering points that extend from shoreline structure into the main basin. Walleye use these as highways between shallow feeding flats and deep resting areas. The tip of the point and the first significant break along its edge are the highest-percentage spots.
- Sunken islands and mid-lake humps: Isolated structure in the middle of a basin is a walleye magnet. The top of the hump is where walleye feed; the deep edges and adjacent basin are where they suspend and stage before moving up.
- Rock-to-sand transitions: Walleye love the edge where hard bottom meets soft bottom. These transitions often concentrate baitfish, and walleye patrol them predictably.
- River channel edges: On reservoirs and flowages, the old river channel acts as a highway system. Walleye travel the channel and stage along the breaks where the channel edge meets adjacent flats.
- Inside turns on breaklines: Any spot where a depth contour creates a concave bend (an inside turn) concentrates fish. These are subtle features that most anglers walk right past, but they consistently hold walleye.
Depth Matters — But It Changes Through Winter
Early ice walleye tend to be shallower than most anglers expect. In many lakes, you’ll find active fish in 8 to 15 feet of water during the first few weeks of safe ice. The weeds are still alive, baitfish are still using the shallows, and walleye haven’t fully transitioned to their deep winter patterns.
By mid-winter, walleye on most natural lakes have settled into deeper structure — 20 to 35 feet is the sweet spot on a lot of Midwest walleye water. They relate tightly to the bottom, often sitting right on the breakline where a flat drops into the basin.
Late ice brings another shift. As melt water begins running under the ice and oxygen levels improve in the shallows, walleye start staging near tributary mouths and shallow structures adjacent to spawning areas. This is when you might catch them in 6 to 12 feet of water again, often on the same points and flats where you found them during early ice.
The key is staying flexible. What worked three weeks ago might be dead water today. Use your electronics aggressively, drill lots of holes, and let the fish tell you where they are rather than forcing a spot based on past success.
Best Times to Catch Walleye Through the Ice
If you take away one thing from this guide, make it this: walleye are a low-light fish, and that fact is amplified under the ice. Their eye structure gives them a biological advantage in dim conditions. They feed most aggressively when light levels are low, and they can become nearly impossible to trigger when the sun is high and bright.
The Golden Windows
The two most productive periods for walleye through the ice are the same ones you’d target during open water — the first and last hour of daylight. Dawn and dusk trigger walleye to move from their deep resting areas up onto shallower feeding structures. This transition is often dramatic. A flat that’s been dead silent on your flasher for hours will suddenly light up with marks as the sun drops toward the horizon.
Morning bites tend to be shorter and more aggressive. Walleye that fed at dusk the night before may not move as far or commit as hard in the morning, but the fish that do show up are often ready to eat. Be set up and fishing at least 30 minutes before legal sunrise.
Evening bites are typically the longest and most consistent windows. Walleye begin staging on the edges of feeding flats in the late afternoon, and the bite can extend well past sunset into full darkness. On many lakes, the best hour of the entire day is the first hour after the sun goes down, especially under a new moon.
Midday Isn’t Dead — But You Need to Adjust
Between the prime low-light windows, walleye don’t disappear. They pull back to deeper structure, hold tight to the bottom, and become significantly less aggressive. Midday walleye can still be caught, but you need to slow down dramatically, downsize your presentation, and fish right on top of their heads. This is when deadsticking a live minnow on a second rod becomes invaluable.
Overcast days are the exception. Heavy cloud cover can extend the bite window across the entire day by keeping light penetration low. Some of our best walleye ice fishing days have been under thick, grey skies with light snowfall — conditions that keep walleye shallow and active far longer than a bluebird day.
Seasonal Patterns Through Winter
- Early ice (first 2-3 weeks of safe ice): The most aggressive walleye fishing of the winter. Fish are still in transition from fall patterns, metabolisms are higher, and competition for food is strong. Fish shallower and faster.
- Mid-winter (January through mid-February in northern states): The toughest stretch. Dissolved oxygen drops, metabolism slows, and walleye become lethargic. Focus on precision, finesse, and fishing the prime low-light windows exclusively.
- Late ice (last 2-3 weeks before ice-out): A resurgence. Walleye feed heavily as they stage for the spawn. They move shallower, become more aggressive, and respond to larger presentations. This is the second-best window of the ice season.
Jigging Techniques for Walleye
The way you move a bait through the water column is at least as important as which bait you tie on. Walleye under the ice can be maddeningly specific about cadence, amplitude, and speed. What triggers a response one day gets completely ignored the next. The key is having multiple approaches in your playbook and reading the fish on your flasher to determine which one they want.
Aggressive Jigging
When walleye are actively feeding — typically during the low-light windows on early or late ice — an aggressive approach gets their attention from a distance. This means snapping the rod tip up 12 to 18 inches, letting the bait flutter and fall on a controlled slack line, and pausing at the bottom of the drop for two to three seconds before repeating.
The purpose of aggressive jigging is attraction. You’re using the flash, vibration, and water displacement of the bait to call fish in from outside your immediate cone angle. Once you see a mark rise on your flasher and approach your bait, immediately transition to a more subtle presentation. This is where most beginners make their biggest mistake — they keep pounding the bait aggressively after a fish shows interest, and the walleye spooks or loses commitment.
Subtle and Finesse Jigging
Once you have a walleye’s attention on your flasher, dial everything back. Tighten the jigging stroke to two to four inches. Slow the cadence. Introduce longer pauses — five seconds, ten seconds, sometimes longer. Tiny lifts, gentle shakes, and controlled drops with a dead pause at the bottom are what convert followers into biters during mid-winter especially.
The quiver technique is devastating on pressured walleye. Hold your rod tip nearly still and vibrate it with just the muscles in your hand — barely enough to move the bait an inch. This makes a jig or spoon shudder in place, mimicking a dying or struggling baitfish. It’s the single most effective trigger we’ve found for walleye that rise to your bait and stall beneath it.
The Pause Is the Trigger
Across all cadences and all conditions, the pause is where bites happen. Most walleye eat a stationary or slowly falling bait, not one that’s ripping upward. Think of your jigging sequence as: attract on the upstroke, trigger on the pause or the fall. When you feel that subtle weight or see the line go slack, set the hook.
Best Walleye Jigs and Lures for Ice Fishing
You don’t need a tackle shop’s worth of ice lures to catch walleye. A handful of proven presentations covers the vast majority of conditions you’ll encounter. Here are the lures we never leave home without.
Jigging Rapala
The Jigging Rapala is arguably the single most effective walleye ice fishing lure ever made. Its balanced, minnow-shaped body darts to the side on the upstroke and glides back to center on the fall, creating a wide search pattern that attracts fish from a significant distance. The #7 (2-3/4 inch) size is the standard walleye size. Fish it in natural colors — silver, perch, and glow patterns — and don’t be afraid to tip the center treble with a minnow head for scent.
The Jigging Rapala is at its best during early ice and late ice when walleye are aggressive enough to commit to a moving bait. During mid-winter, its wide darting action can be too much for lethargic fish.
Puppet Minnow
Where the Jigging Rapala darts, the Puppet Minnow glides and rocks. It has a more subtle, nose-down posture on the fall that mimics a dying baitfish. The Puppet Minnow excels during mid-winter when you need a bait that moves but doesn’t spook tentative walleye. Use it with shorter, slower jigging strokes and longer pauses than you’d give a Jigging Rap.
Spoons
Spoons are the workhorse of walleye ice fishing. A good spoon falls with a fluttering, tumbling action that walleye find irresistible, and it does double duty as both an attractor and a trigger bait. Key models include:
- Leech Flutter Spoon: Wide, thin profile with a slow, erratic flutter on the fall. Outstanding in shallow to moderate depths.
- Swedish Pimple: The classic. Heavier for its size, so it cuts through current and reaches depth quickly. A staple for deep structure walleye.
- PK Flutter Fish: Combines spoon flutter with a fish-shaped profile. Excellent all-around choice.
Carry spoons in 1/4 oz, 3/8 oz, and 1/2 oz to match depth and current. Glow colors (chartreuse, pink, white) are critical for low-light and dark-water conditions. Charge them with a UV light before every drop.
Hair Jigs and Bucktails
A hair jig — a jig head dressed with marabou, bucktail, or synthetic hair — is one of the most underrated walleye presentations through the ice. The material breathes and pulses with the slightest rod movement, creating lifelike action even on a dead pause. Hair jigs in 1/8 oz to 3/8 oz tipped with a minnow head are deadly on finesse-conscious mid-winter walleye. Fish them with a subtle lift-and-drop cadence and focus on keeping the jig within 6 inches of the bottom.
Live Bait Options for Walleye
Artificial lures get the attention, but live bait closes the deal more often than not — especially during the tougher phases of winter. If local regulations allow it, live bait should be part of your walleye ice fishing system.
Minnows Are King
Fathead minnows and shiners are the two most common live bait options for walleye through the ice. Fatheads in the medium size range (1.5 to 2 inches) are the all-around standard. They’re hardy, cheap, available everywhere, and walleye eat them readily. Shiners are larger and livelier, making them a better choice when you’re targeting bigger walleye or fishing during aggressive bite windows.
Sizing Your Minnow
Match minnow size to the conditions. During early and late ice when walleye are feeding aggressively, don’t be afraid to go bigger — 3 to 4 inch shiners or creek chubs will select for larger fish. During mid-winter, downsize to smaller fatheads. A walleye that won’t commit to a large minnow will often eat a small one.
Hooking Methods
How you hook a minnow matters more than most anglers realize:
- Through the back: Hook through the dorsal area just behind the dorsal fin, avoiding the spine. This keeps the minnow swimming naturally and is the best option for horizontal-swimming presentations on a jigging lure.
- Through the lips: Hook upward through the lower lip and out the upper lip. This is the standard hooking method for jig-and-minnow setups where you want the minnow hanging vertically and swimming upward.
- Through the tail: Hook through the tail just ahead of the tail fin. This causes the minnow to swim downward, which can be a deadly variation when walleye are on the bottom and reluctant to chase upward.
Change your minnow frequently. A dead or sluggish minnow on the hook is dramatically less effective than a fresh, lively one. We swap minnows every 15 to 20 minutes during slow bites.
Deadsticking as a Second Line
If your state or province allows two lines, deadsticking is the single most productive addition to your walleye ice fishing approach. A deadstick is simply a second rod set in a rod holder over a nearby hole, rigged with a plain hook or small jig and a live minnow, left to sit with minimal or no movement.
The philosophy is simple: your active jigging rod attracts walleye into your area, and the deadstick — sitting still, presenting a natural, swimming minnow — gives reluctant fish an easy meal they don’t have to chase. It’s remarkable how often a walleye that won’t commit to a jigging lure will swim over and eat the deadstick minnow without hesitation.
How to Rig a Deadstick
Use a light to medium-light action rod with a sensitive spring bobber or a strike indicator. Spool with 4 to 6 pound fluorocarbon for minimal visibility. Tie on a #6 or #4 plain hook or a small (1/16 oz to 1/8 oz) jig head. Hook a lively minnow through the back and set it 6 to 18 inches off the bottom. Place the rod in a holder so the rod tip is visible, set the drag light enough that a walleye can take line without feeling resistance, and watch for the tip to load.
Position your deadstick hole 5 to 15 feet from your active jigging hole. Too close and the two presentations compete; too far and you can’t reach it in time when a fish hits. The ideal setup lets you jig actively with one hand while keeping the deadstick rod tip in your peripheral vision.
Reading Your Flasher for Walleye
A flasher is the most important tool in an ice walleye angler’s arsenal. It tells you the depth, shows your bait, reveals fish, and — if you learn to read it well — tells you exactly how those fish are behaving. The difference between a beginner and an experienced walleye angler often comes down to how much information they extract from that circular display.
Understanding Walleye Behavior on the Flasher
Walleye show up differently than panfish on a flasher. A crappie or bluegill typically rises quickly and aggressively toward a bait, producing a fast-moving mark. Walleye are more deliberate. You’ll see a mark lift off the bottom slowly, rise partway toward your bait, and then hover. That hover is the decision point — the walleye is evaluating your presentation.
What you do in the next few seconds determines whether the fish commits or drops back to the bottom. This is where the finesse jigging and quiver techniques we discussed earlier become critical. Give the fish something subtle to react to. If it continues rising, you’re winning. If it stalls or starts sinking, try a dead pause or change your cadence entirely.
Color Signals
Most three-color flashers display targets in green (weakest return), orange (moderate), and red (strongest). A walleye approaching your bait will often appear as a green mark that transitions to orange and then red as it gets closer to your transducer cone’s center. When your bait mark and the fish mark merge and your line goes slack or you feel weight, set the hook.
Learn to distinguish between your bait and a fish mark. Your bait produces a consistent mark at a known depth. A fish mark appears, moves, and may merge with your bait mark. With practice, you’ll be able to watch the entire sequence — fish rises, approaches bait, follows, commits — in real time on the flasher display. For a deeper dive into flasher selection, see our best ice fishing flashers and sonar roundup. And if you want a detailed look at the unit we trust most on walleye water, read our full Vexilar FLX-28 review.
Zoom and Bottom Lock
For walleye fishing, the bottom zoom or bottom lock feature on your flasher is invaluable. It expands the bottom portion of the water column on your display, giving you much better resolution for seeing fish that are hugging the substrate. A walleye sitting one foot off the bottom in 30 feet of water is nearly invisible on a full-range display. With bottom lock engaged, that same fish becomes a clearly defined, separate mark. Use this feature aggressively when targeting walleye.
Electronics Setup for Walleye
Dialing in your electronics properly makes everything easier. Here’s how we set up for a walleye-focused outing.
Gain and Sensitivity
Start with the sensitivity (gain) at about 60 to 70 percent and adjust from there. Too low and you’ll miss subtle marks — walleye sitting right on the bottom will blend into the bottom signal. Too high and the display fills with noise, making it harder to distinguish real targets. The sweet spot is where your jig shows as a clear, consistent mark and you can see the bottom as a defined band with minimal clutter above it.
Beam Angle Selection
Most quality flashers offer multiple beam angles. For walleye fishing in 15 to 35 feet, we run a 19-degree cone angle. This gives you a wide enough viewing area to see fish approaching from the sides while still maintaining good target separation at depth. In shallower water (under 12 feet), consider narrowing to a 9-degree cone for tighter resolution.
Interference Rejection
On a busy lake with dozens of anglers running electronics, interference from neighboring units can wreck your display. Engage your interference rejection and step through the settings until the noise clears. The Vexilar FLX-28’s five-step interference rejection system handles crowded ice better than any unit we’ve tested.
Common Mistakes Walleye Ice Anglers Make
After years of guiding and fishing with anglers of all experience levels, we see the same mistakes repeatedly. Avoiding these will immediately improve your catch rate.
-
Fishing too long over dead holes. If you haven’t marked a walleye in 20 to 30 minutes, move. Walleye are predictable in where they travel, but they aren’t everywhere. Drill more holes, cover more structure, and let your flasher tell you where fish are staging.
-
Jigging too aggressively when a fish is watching. We covered this above, but it bears repeating. The number one reason walleye abandon your bait after showing interest is that you spooked them with too much movement. When you see a fish on the flasher, go to your most subtle presentation immediately.
-
Ignoring the night bite. On many lakes, the best walleye fishing happens after dark. If regulations allow it and you can fish safely, the first two hours after sunset are often more productive than any other window during the day. Most anglers pack up at dark and miss the best fishing.
-
Using line that’s too heavy. Walleye under the ice have clear water and plenty of time to inspect your presentation. Fluorocarbon in 4 to 6 pound test should be your standard. Going heavier reduces bites noticeably, especially during mid-winter.
-
Not using glow. Walleye feed primarily during low-light conditions, and glow colors (chartreuse, pink, white, green) give your bait visibility when natural light is minimal. Charge your glow lures with a UV flashlight before every drop and recharge every 10 to 15 minutes. The difference in bite frequency between a freshly charged glow bait and a dead one is dramatic.
-
Fishing the wrong depth for the time of day. If you’re on a shallow flat at noon, you’re probably too shallow. If you’re in 30 feet of water at sunset, the fish likely moved up to 15. Adjust your position based on light conditions and the time-of-day patterns we outlined above.
-
Neglecting fresh bait. A dead minnow on a hook or tipping a jig catches exponentially fewer walleye than a fresh, lively one. Check and replace your bait constantly. It’s a small effort that pays large dividends.
Frequently Asked Questions
What depth should I target for walleye through the ice?
Depth depends on the season and the specific lake structure. During early ice, focus on 8 to 15 feet over remaining weed edges and shallow points. Mid-winter pushes walleye deeper onto main lake structure in 20 to 35 feet. Late ice brings them shallower again as they stage for the spawn. The best approach is to start on known structure at a moderate depth (18 to 25 feet), use your flasher to check for marks, and adjust shallower or deeper based on what you find. Your electronics eliminate the guesswork — use them to scan depth ranges until you locate active fish. For guidance on choosing the right electronics, check our best flashers and sonar roundup.
What is the best line for walleye ice fishing?
Fluorocarbon in 4 to 6 pound test is the standard for walleye jigging through the ice. Fluorocarbon’s near-invisibility underwater is a significant advantage in the clear-water conditions common during winter. It also has minimal stretch compared to monofilament, which improves sensitivity for detecting subtle bites. For deadstick rods, 4 pound fluorocarbon gives the most natural minnow presentation. Some anglers prefer braided mainline with a fluorocarbon leader for the added sensitivity on their jigging rod — this is a strong system but requires a reliable knot connection between the two materials.
How do I catch walleye when the bite is slow during mid-winter?
Mid-winter walleye fishing demands patience and precision. Downsize everything — smaller jigs, smaller minnows, lighter line. Slow your cadence dramatically and extend your pauses to 10 seconds or more. Focus exclusively on the prime feeding windows at dawn and dusk rather than grinding through unproductive midday hours. Position your deadstick closer to the bottom (6 inches off rather than 18), and use your flasher’s zoom feature to watch for subtle marks that rise only a foot or two off the substrate. Sometimes a walleye in mid-winter will barely lift off the bottom to eat — you need to bring the bait to them rather than expecting them to rise to you.
Can you catch walleye at night through the ice?
Absolutely, and on many lakes the night bite is the most consistent walleye fishing of the entire ice season. Walleye are built for low-light feeding, and darkness eliminates the midday shutdown that plagues daytime anglers. The first two hours after sunset and the last hour before sunrise are typically the hottest windows. Use glow lures recharged frequently with a UV light, fish shallower than you would during the day (walleye push up onto feeding flats aggressively after dark), and keep noise and light in your shelter to a minimum. Always verify that night fishing is legal in your area and follow all ice safety protocols — headlamps, ice picks, and a buddy are non-negotiable after dark.
What size jig is best for walleye through the ice?
For most walleye ice fishing, jigs in the 1/8 oz to 3/8 oz range cover the vast majority of conditions. Use lighter jigs (1/8 oz to 1/4 oz) in shallow water under 15 feet and when walleye are finicky — the slower fall rate gives tentative fish more time to commit. Use heavier jigs (3/8 oz to 1/2 oz) in deeper water over 25 feet or when there’s current, so you can maintain bottom contact and keep your line vertical. The most common mistake is going too heavy in shallow water, which creates an unnatural fall speed that walleye reject. When in doubt, err lighter. You can always switch up to a heavier jig, but it’s hard to undo spooking a fish with a bait that crashed past its face. For more on building out your ice fishing setup from scratch, our beginner’s guide walks through gear selection in detail.
Walleye through the ice reward anglers who put in the work to understand their patterns and present baits with precision. The fish are down there — every piece of structure on your lake holds walleye somewhere during winter. Your job is to find the right structure, be there during the right window, and show them something they can’t refuse. Drill holes, trust your electronics, stay mobile, and fish the transitions. The ice walleye season is short, but the fishing can be extraordinary. To learn more about how we test and evaluate the gear we recommend throughout this guide, visit our methodology page.