There’s a reason kayak fishing is one of the fastest-growing segments in the sport. You launch where you want, fish where boats can’t reach, and answer to nobody’s schedule but your own. No ramp fees, no marina slips, no arguing over who forgot to charge the trolling motor. Just you, a paddle, and water that most anglers never touch.
If you’ve been thinking about getting into kayak fishing but feel overwhelmed by the options, the gear lists, or the safety questions — we’ve been exactly where you are. The learning curve is real, but it’s shorter than you think. We’ve spent years fishing from kayaks across everything from farm ponds to coastal flats, and the honest truth is that most beginners are catching fish within their first few trips once they nail the fundamentals.
This guide covers everything you need to go from curious to confident on the water. We’ll walk through choosing your first kayak, the gear that actually matters, how to stay safe, where to start fishing, and the techniques that produce results from a low-profile platform. For deeper dives into specific gear and rigging, explore our full kayak fishing hub where we break down everything from pedal drives to electronics.
Choosing Your First Fishing Kayak
The kayak you pick will shape your entire experience on the water, so it’s worth getting this decision right. You don’t need to spend a fortune, but you do need to understand the trade-offs.
Sit-on-Top vs. Sit-Inside
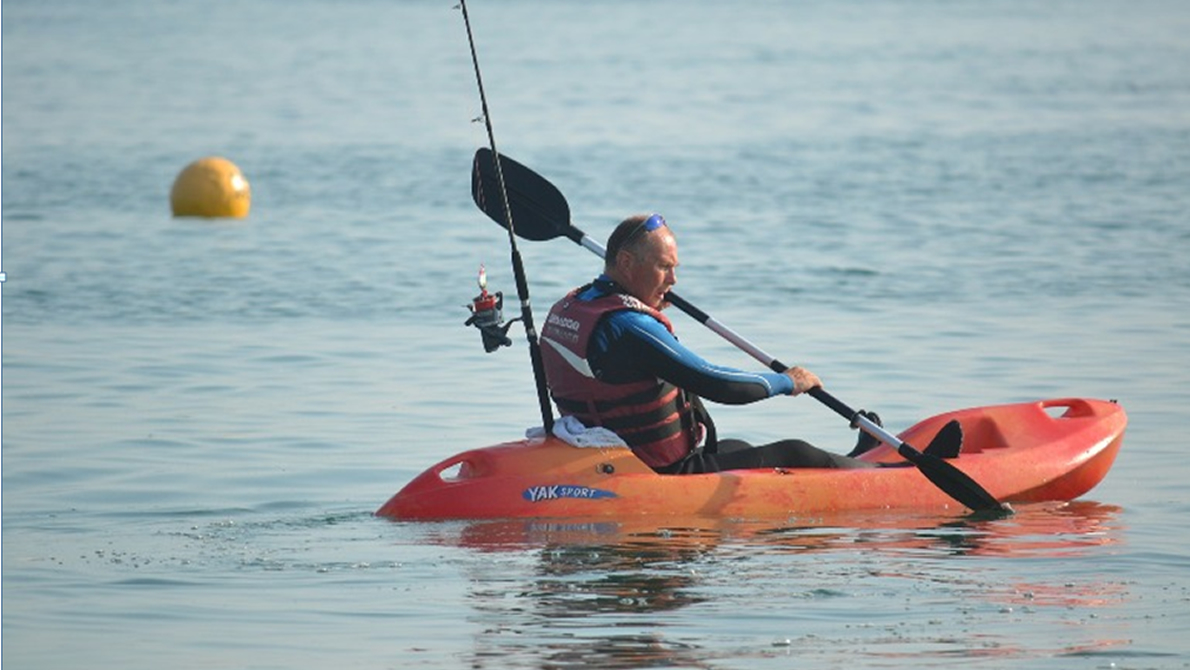
For fishing, sit-on-top kayaks dominate the market — and for good reason. They offer an open deck layout that gives you room to move, easy access to tackle and gear, and self-draining scupper holes that shed water automatically. If you capsize, re-entry is straightforward because you simply climb back on top rather than trying to empty a flooded cockpit.
Sit-inside kayaks have a lower center of gravity and keep your legs out of the elements, which makes them popular for cold-weather paddling. But the enclosed cockpit limits your range of motion for casting, makes it harder to access gear, and complicates self-rescue if you flip. Some dedicated anglers use sit-insides in specific cold-water scenarios, but for a first fishing kayak, a sit-on-top is the right call for the overwhelming majority of beginners.
Paddle vs. Pedal Drive
A traditional paddle kayak is the most affordable entry point into the sport. Expect to spend $500 to $1,200 for a capable fishing-specific paddle kayak. The trade-off is that you sacrifice hands-free propulsion — every time you need to reposition, you’re putting the rod down and picking up the paddle.
Pedal drive kayaks solve that problem by freeing your hands completely. You pedal with your feet and fish with your hands simultaneously, which is a genuine game-changer for techniques like trolling, drift fishing, and sight casting where boat control and casting happen at the same time. The downside is cost: quality pedal drive kayaks start around $1,800 and climb past $4,000 for premium hulls. We’ve tested the top options in our best pedal drive fishing kayaks roundup if you’re leaning that direction.
Our recommendation for beginners: Start with a quality paddle kayak in the $700 to $1,000 range. Learn the fundamentals of kayak fishing without a massive financial commitment. If you love the sport — and most people do — you can upgrade to a pedal drive later with a clear understanding of what features matter to you.
Size and Stability Considerations
Fishing kayaks generally fall between 10 and 14 feet in length. Here’s how length affects performance:
| Length | Best For | Trade-off |
|---|---|---|
| 10-11 feet | Small ponds, creeks, easy transport | Less stable, less storage, slower |
| 12-13 feet | Best all-around for most beginners | Good balance of stability, speed, and capacity |
| 14+ feet | Open water, long distances, heavy loads | Heavier, harder to transport, more expensive |
Width matters as much as length for beginners. A wider kayak (34 inches and above) provides more initial stability, which translates to confidence when casting, leaning to land a fish, or turning around to grab something from behind your seat. You give up speed and paddling efficiency with extra width, but for fishing purposes, stability wins every time.
Weight capacity is the number most beginners overlook. Manufacturers list a maximum capacity, but you should plan to use no more than 65 to 70 percent of that number. A kayak rated for 400 pounds performs best when loaded to around 260 to 280 pounds — that’s you, your gear, your tackle, your cooler, and anything you catch. Pushing a kayak to its rated max makes it sluggish, unstable, and sits dangerously low in the water.
Essential Gear Checklist
You don’t need everything at once, but there’s a core set of gear that separates a safe, productive trip from a frustrating one. Here’s what we consider essential for your first season, in order of priority.
Personal Flotation Device (PFD)
This is non-negotiable. Wear a PFD every single time you’re on the water. A kayak-specific PFD is designed with a high-back panel that clears your seat, mesh construction for ventilation, and pockets for small essentials like pliers, a whistle, and a knife. Standard bulky life jackets designed for boating ride up against a kayak seat and become uncomfortable within minutes, which is exactly why people stop wearing them — and that’s when drowning happens.
Budget around $80 to $150 for a quality fishing-specific PFD. The NRS Chinook, Stohlquist Fisherman, and Astral EV-Eight are all proven options that anglers wear all day without complaint.
Paddle
If you’re fishing from a paddle kayak, your paddle is the engine. A 230 to 240 cm paddle suits most fishing kayaks and most paddlers between 5’6” and 6’2”. Fiberglass or carbon fiber shafts reduce fatigue on long paddles compared to aluminum, but a decent aluminum paddle in the $50 to $80 range works fine for getting started.
A paddle leash is a cheap insurance policy — clip your paddle to the kayak so it doesn’t float away when you set it down to fish. A lost paddle in wind or current is a genuine emergency.
Rod Holders
Fishing from a kayak without rod holders is an exercise in frustration. You need somewhere to secure rods while you paddle, re-rig, or fight a fish on another line. Most fishing kayaks come with flush-mount rod holders behind the seat, but if yours doesn’t — or if you want more — aftermarket options from Scotty and RAM mount directly to accessory tracks.
We walk through the full installation process and placement strategy in our guide to rigging a fishing kayak, including the mistakes that cost beginners time and money.
Anchor or Stake-Out Pole
Holding position is critical for kayak fishing. In water under 8 feet deep, a stake-out pole (a fiberglass or composite pole you jam into the bottom) is the simplest and quietest solution. In deeper water, a 1.5 to 3-pound folding anchor with a quick-release system gives you the ability to lock onto structure, current seams, or drop-offs.
Never tie an anchor line directly to your kayak. Use a quick-release system — either a dedicated anchor trolley running bow-to-stern or a simple carabiner clip that you can release under load. If current or wind pulls your kayak under a locked anchor line, you need to be able to cut free instantly.
Fish Finder
A fish finder transforms kayak fishing from guesswork into informed decision-making. Even a basic unit shows you depth, bottom contour, structure, and whether fish are present. On a kayak, where you’re covering less water than a bass boat, knowing exactly what’s below you is a force multiplier.
The Garmin Striker Vivid 7sv is the unit we most frequently recommend to kayak anglers getting into electronics. It delivers clear CHIRP sonar, SideVu and ClearVu scanning, built-in GPS with waypoint marking, and a screen size that’s actually readable on the water — all at a price point that makes sense for a first fish finder. For more options at different budgets, check out our best fish finders for kayak fishing roundup.
Tackle Storage and Organization
Space is limited on a kayak. A milk crate or purpose-built kayak crate strapped behind the seat is the most popular storage solution — it holds tackle trays, pliers, a net, and drinks in one organized package. Soft-sided tackle bags that fit in hull compartments work well too. The key is keeping everything within arm’s reach and secured so it doesn’t end up in the water during a rough crossing or a hard hook set.
Safety Fundamentals
Kayak fishing is safe when you respect the conditions. It becomes dangerous when you ignore them. These are the safety practices that separate experienced kayak anglers from cautionary tales.
Weather and Wind
Check the forecast before every trip, and check it again before you launch. Wind is the single biggest safety factor for kayak anglers. A 15 mph wind that’s manageable in a bass boat can turn a kayak trip into a survival situation — especially if you’re fighting it to get back to your launch point.
As a beginner, adopt a hard ceiling: do not launch in winds above 10 to 12 mph, and plan to be off the water before afternoon winds build. Morning sessions are almost always calmer and more productive. Watch for wind direction relative to your launch — launching with the wind at your back feels great until you realize you’re paddling into it for the entire return trip.
Tides and Current
If you’re fishing tidal water, understand the tide schedule before you go. Outgoing tides can sweep you away from your launch point, expose mud flats that trap your kayak, or create dangerous current at inlets and passes. Incoming tides can flood your launch area or push you into areas you didn’t plan to be.
Carry a tide chart or use a tide app. Fish the slack periods when you’re learning, and save the moving water for when you have more experience reading current and managing boat control in flow.
Cold Water and Hypothermia
Cold water kills kayak anglers. This is not an exaggeration. Water below 60 degrees Fahrenheit can incapacitate a healthy adult in minutes through cold water shock — gasping reflex, hyperventilation, and loss of muscle control that makes self-rescue nearly impossible. Water below 50 degrees can kill in as little as 15 to 30 minutes.
If you’re fishing in cold water (spring and fall in most of the country, year-round in the northern states), dress for immersion, not for air temperature. That means a drysuit or wetsuit, not jeans and a hoodie. If you can’t afford proper immersion gear, don’t fish cold water from a kayak. Period.
Self-Rescue Practice
Before you fish from a kayak, you should know how to get back into it after a capsize. This is not a theoretical skill — it’s a practical one that you need to rehearse in controlled conditions before you need it for real.
Find a calm, shallow area on a warm day. Deliberately capsize your kayak and practice climbing back on (for sit-on-tops) or re-entering and pumping out (for sit-insides). Do it until it feels routine. Then do it while wearing your PFD. Then do it with a paddle in one hand. This drill takes 30 minutes and could save your life.
Where to Start Fishing
The temptation for new kayak anglers is to head straight for the big water — the main lake, the open bay, the river with the legendary reputation. Resist that temptation. Start on protected water and build your skills before you expand your range.
Protected Water First
Small lakes, ponds, sheltered coves, calm rivers, and protected bays are the ideal classrooms for learning kayak fishing. They offer manageable conditions, shorter distances to cover, and environments where a mistake is inconvenient rather than dangerous. You’ll learn paddle control, casting from a seated position, boat management in wind, and anchoring technique in a forgiving setting.
Once you’re comfortable holding position in a breeze, landing fish without tipping, and reading water from a kayak’s low vantage point, you can graduate to bigger, more exposed water with confidence.
Launch Considerations
Not every boat ramp is a good kayak launch. Look for spots with gradual shoreline access — sandy beaches, gently sloped banks, or kayak-specific launches with low docks. Steep, rocky banks and busy power-boat ramps on Saturday mornings are not where you want to learn.
Load your kayak with all your gear before dragging it to the water’s edge. A kayak cart (a simple set of wheels that cradles the hull) makes transport from your vehicle to the waterline dramatically easier, especially on longer carries. Once at the water’s edge, position the kayak so the stern is in the water and the bow is on land. Sit down in the seat, push off with your hands, and you’re fishing.
Basic Techniques From a Kayak
Fishing from a kayak requires adjusting your technique to account for a lower vantage point, a less stable platform, and the fact that you are the boat’s motor. Here are the foundational techniques that produce fish from a kayak.
Casting
Cast from a seated position with a compact, sidearm motion rather than a full overhead cast. Overhead casting works but shifts your center of gravity higher, which creates instability — especially when you’re throwing heavier lures. Keep your movements smooth and controlled. Accuracy matters more than distance from a kayak because you can silently position yourself closer to your targets than any motorized boat.
Expect to snag your own lines, paddle, and gear for the first few trips. It happens to everyone. Streamline your deck layout, keep loose line managed, and you’ll hook fewer accessories and more fish as your muscle memory develops.
Anchoring and Position Holding
Learning to anchor effectively is one of the highest-value skills in kayak fishing. When you find a productive spot — a submerged point, a weed edge, a current seam — the ability to hold position and work it thoroughly is what separates a good trip from a great one.
An anchor trolley lets you adjust where the anchor line contacts your kayak from bow to stern, which controls the angle your kayak sits in the current or wind. Pointing your bow into the current keeps you stable and in line. Running the anchor to the stern lets you drift your bait downstream naturally. Experiment with anchor positions to find what works for each situation.
Drift Fishing
Sometimes the most effective approach is to let the wind or current move you across a flat, along a weed line, or over a point while you cast or drop a bait below. Drift fishing covers water efficiently and presents your bait naturally. Control your drift speed with occasional paddle strokes or a drift sock (a small underwater parachute that slows you down).
A fish finder is especially valuable when drift fishing because it shows you what’s below in real time — you can mark productive spots and circle back for another pass over the fish you found.
Trolling
Trolling — dragging a lure behind your kayak as you paddle or pedal — is one of the most effective and beginner-friendly techniques available. It keeps your bait in the water for the maximum amount of time, covers large areas, and lets the kayak’s movement provide the lure action. It’s devastatingly effective for species like walleye, trout, striped bass, and pike.
Set your rod in a rod holder behind you, let out 50 to 100 feet of line (depending on the depth and lure you’re running), and paddle at a steady pace. Crankbaits, spoons, and paddle-tail swimbaits are all excellent trolling options. Pedal drive kayaks are particularly well-suited to trolling since your hands stay free to manage rods and fight fish. If trolling interests you, our pedal drive fishing kayak roundup covers the best hulls for the technique.
Transporting Your Kayak
Getting your kayak to the water is half the battle for beginners. Here are the three most common transport methods and what to know about each.
Roof Rack
The most popular option for SUVs and cars. A set of J-cradles or saddle-style carriers mounted on crossbars holds your kayak securely on the roof. Loading a 60 to 80-pound kayak overhead by yourself takes practice — look for assisted-loading systems or use a towel draped over one crossbar as a sliding pad to walk the kayak up from the side. Always use bow and stern tie-downs in addition to the cradle straps. A kayak on a roof rack at highway speed generates enormous force, and cradle straps alone are not sufficient.
Trailer
A kayak trailer is the easiest loading option and accommodates multiple kayaks, but adds cost, storage space requirements, and the need to back a trailer at the launch. Small, purpose-built kayak trailers start around $400 and carry two to four kayaks. If you fish with a partner or plan to own multiple boats, a trailer pays for itself in convenience quickly.
Truck Bed
Trucks with 6- or 8-foot beds can carry most kayaks with the tailgate down and a bed extender or flag on the overhang. Rachet straps through the scupper holes and around tie-down points in the bed keep things secure. This is the simplest method if you already own a truck — no racks, no trailer, no overhead loading. Just slide it in and strap it down.
Regardless of your transport method, always do a strap check after the first 10 minutes of driving. Straps settle and loosen as you drive, and a brief stop to retighten is far better than watching your kayak in the rearview mirror.
Common Beginner Mistakes
We’ve made most of these ourselves, and we’ve watched hundreds of other beginners make them too. Avoid these and you’ll be ahead of the curve from day one.
Overloading the kayak. Loading every piece of gear you own because you “might need it” pushes your kayak past its comfortable working capacity. The result is a sluggish, unstable boat that sits low in the water. Pack light, especially for your first trips. You can always add gear as you learn what you actually use.
Ignoring the wind forecast. We’ve already emphasized this, but it bears repeating. Wind is the number-one reason kayak fishing trips go sideways. A gorgeous, sunny forecast with 18 mph winds is not a kayak fishing day. Wait for calm conditions and you’ll have more fun and catch more fish.
Skipping the PFD. It’s hot. The PFD is uncomfortable. You’re a good swimmer. We’ve heard every excuse, and none of them hold up against the statistics. Wear it. Every trip. No exceptions.
Standing up too soon. Some kayaks are stable enough to stand and fish from, but that’s a skill you earn after many hours of seated fishing. Until you’re completely comfortable with your kayak’s stability and your own balance, stay seated.
Not practicing paddling before fishing. Your first kayak trip should be a paddling trip, not a fishing trip. Spend an hour learning how your kayak handles — how it turns, how it tracks, how it responds to wind, how to brace with your paddle if you feel unstable. Then go fishing.
Neglecting to secure gear. Everything that isn’t tied down, clipped on, or stowed in a compartment can and will end up in the water. Rods, pliers, tackle boxes, phones, sunglasses — leash or secure anything you don’t want to lose. The first time you watch a $200 pair of sunglasses sink into 15 feet of water, this lesson becomes very real.
Frequently Asked Questions
How much does it cost to get started kayak fishing?
A realistic beginner budget breaks down roughly like this: fishing kayak ($600 to $1,000), paddle ($50 to $100), PFD ($80 to $150), rod holders and basic rigging ($50 to $100), anchor system ($30 to $60), and tackle you may already own. That puts a fully equipped beginner setup in the $800 to $1,400 range. You can spend less with a used kayak, or significantly more if you start with a pedal drive. A fish finder adds $200 to $500 depending on the unit but is an investment that pays for itself in productivity. We detail the testing methodology we use to evaluate all the gear we recommend.
Is kayak fishing safe for beginners?
Yes — with the right preparation. Kayak fishing is statistically safe when anglers wear PFDs, check weather conditions, fish appropriate water for their skill level, and practice basic self-rescue. The vast majority of kayak fishing fatalities involve anglers who were not wearing a PFD, were fishing in conditions beyond their skill level, or both. Take a kayak safety course, practice your self-rescue, respect the weather, and always wear your PFD. Do those four things and the risk profile drops dramatically.
What type of kayak is best for a beginner angler?
A sit-on-top fishing kayak in the 12 to 13-foot range with a width of 33 inches or more is the sweet spot for most beginners. This size provides good stability, adequate storage, reasonable paddling performance, and enough deck space to fish comfortably. Look for a hull with built-in rod holders, accessory tracks, and a comfortable seat with adjustable back support. Paddle kayaks in this category from brands like Wilderness Systems, Perception, and Vibe offer excellent value in the $700 to $1,000 range.
Do I need a fish finder for kayak fishing?
You don’t need one to catch fish, but a fish finder dramatically accelerates the learning curve. It shows you depth, bottom structure, and fish presence — three things that are nearly impossible to determine from the surface. For kayak anglers covering unfamiliar water, a fish finder eliminates hours of unproductive casting over empty water. If budget allows, we recommend adding one to your setup within your first season. Our best fish finders for kayak fishing guide covers the top options at every price point.
Can I use my regular fishing rods on a kayak?
You can, but shorter rods perform better from a kayak. A 6’6” to 7-foot medium or medium-heavy rod is ideal for most kayak applications — long enough to cast effectively but short enough to manage in the confined space without hooking your own gear or tangling in rod holders. Avoid rods longer than 7’6” until you’re comfortable with your deck layout. One-piece rods are fine for kayak fishing despite what you might read online — they fit easily in flush-mount rod holders and along the hull during transport.